
Tech and fitment

Measure twice.
Press once.

Everything you need to know before ordering a top-mount radial bearing: where it sits, what to measure, and how to seat it so it runs true.

Fig. 02 / top mount, sectionTOP MOUNTRADIAL BEARINGSPRING PERCHSPRINGSTRUT

Before you order

Four numbers and a name.

We publish the bearing dimensions on each product page as they are confirmed. Until your coilover is on the fitment list, these are the measurements that let us confirm a match.

01 / mm
Pocket bore
The diameter of the pocket in the top mount that the bearing presses into. Measure the pocket itself, not the old bearing, if the old one is worn or missing.
02 / mm
Shaft or sleeve diameter
The diameter of the strut shaft or the sleeve that passes through the bearing. This sets the inner race.
03 / mm
Pocket depth
How deep the pocket is, so the bearing sits flush and the perch above it does not bottom on the plate.
04 / text
Coilover and vehicle
Coilover brand and model, and the vehicle it is on. Many mounts are shared across models and this is the quickest way to confirm a match.

Send them over

Email the four measurements, or just the coilover model and a photo of the mount, and we will confirm fitment and availability.

Email fitment details

Install notes

Seat it square, load it right.

General practice for pressing a radial bearing into a top mount. Your coilover manufacturer’s instructions and torque figures take precedence for the rest of the stack.

  1. Step 01

    Clean and inspect the pocket

    Clean the pocket down to bare metal and check it for burrs or ovality. A bearing pressed into a damaged pocket will not run true.

  2. Step 02

    Seat it on the outer race

    Press the bearing in square, on the outer race only. Never drive it in through the inner race or the balls; that loads the raceway the wrong way.

  3. Step 03

    Rebuild the stack

    Reassemble the spring perch, spring and top nut in the order your coilover manufacturer specifies, and torque the top nut to their figure. We do not publish torque values because they belong to the strut, not the bearing.

  4. Step 04

    Check for free rotation

    With the car on the ground, turn lock to lock. The strut should rotate smoothly with no notchiness and no clunk at the top of the tower.

The original part

The 60 mm Radial Adapter.

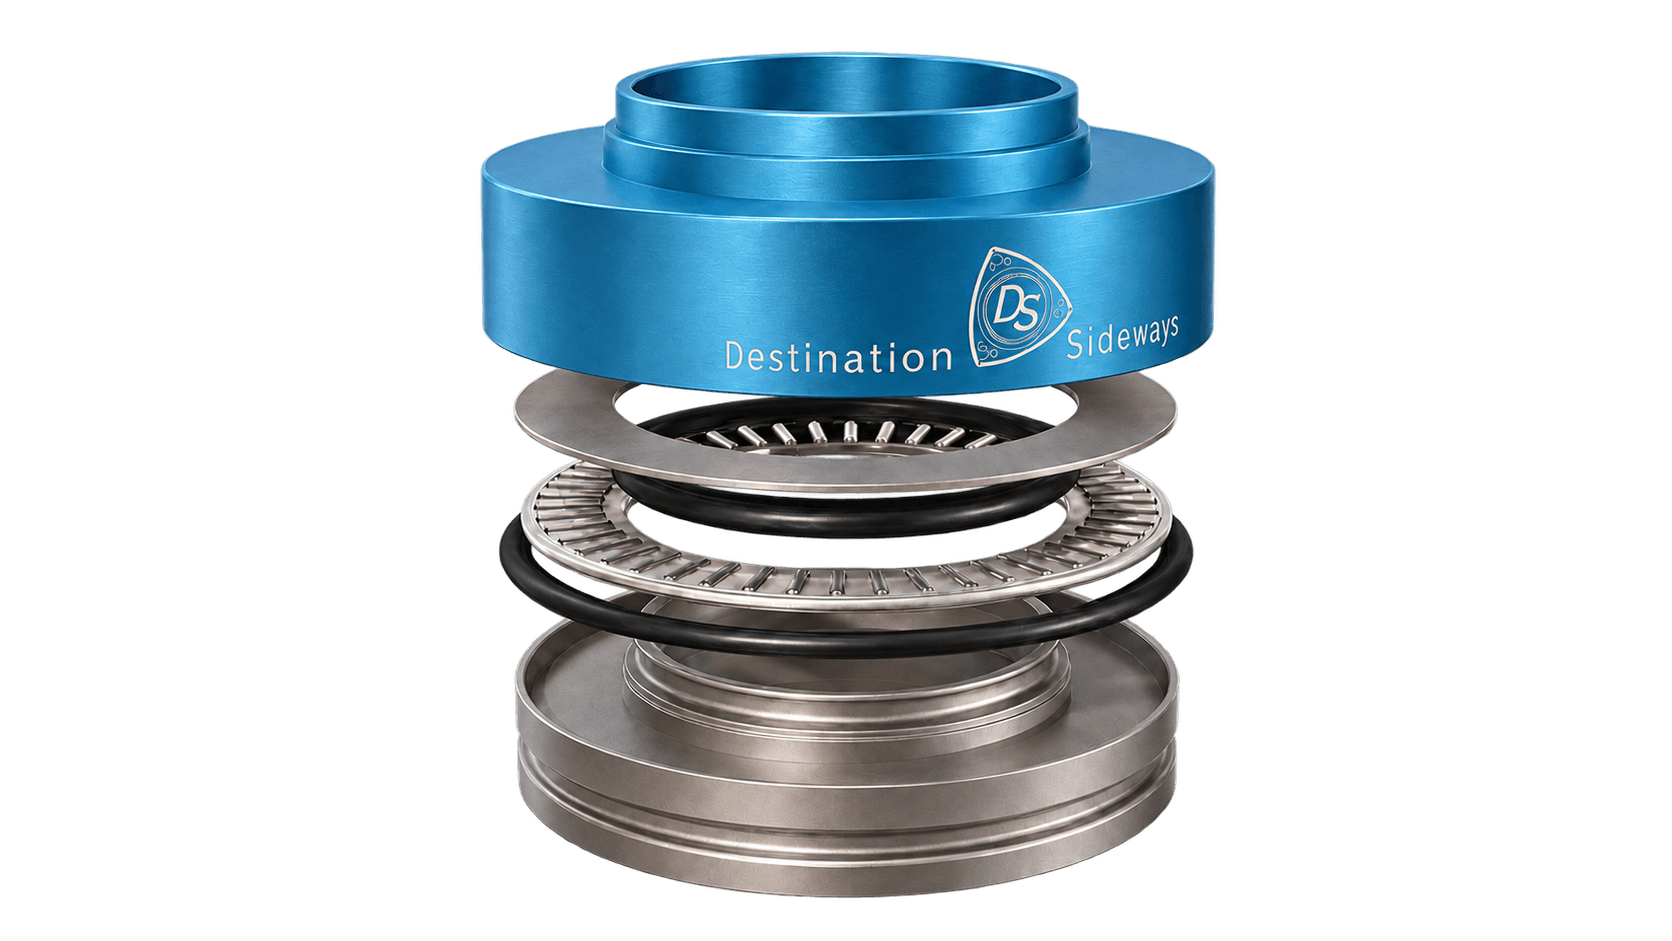
The part Destination Sideways was built around: a radial bearing adapter that sits under the upper spring perch of a 60 mm coilover so the perch and spring turn on rolling elements. It was first made in Bend, Oregon. The figures here come from the 2021 product page and describe that run; the current production spec is confirmed on each listing before it goes live.

2021 spec, historical
Coilover size
60 mm
Stack height
22 mm
Material
Anodized 6061-T6 aluminum
Height note
Adds 22 mm to the stack

Because the adapter adds height, a car lowered to the limit of its coilovers may need shorter springs or a lower-profile damper to keep its ride height. Check the perch travel you have before ordering.

Questions

Asked often.

Not covered here? Ask us directly.

What does the bearing actually do?

In a strut-type suspension the whole strut turns with the steering. A radial bearing at the top lets that happen on rolling elements instead of twisting a rubber bushing, so the steering does not have to overcome the bushing's wind-up.

Will one size fit my coilovers?

Not necessarily. Top mount pockets vary in bore, depth and shaft size across coilover brands, and sometimes between revisions of the same model. Send us the measurements above or the coilover model and we will confirm before you order.

How do I know the old one is worn?

Any notchiness, roughness or play when you turn the strut by hand, or a clunk from the top of the tower over bumps, is a sign the bearing is worn. Grit and water getting past the seal are the usual causes.

What if I am not sure about a measurement?

Email the measurements or the coilover model and a photo of the mount. We would rather check twice than send a set that does not seat.